2009
Sub-archives
Sep 20, 2009
MacBook Pro Triple Boot With Arch Linux, XP and OS X
We just hired some new people at Six Feet Up which means we had to buy new laptops. Every once in a while I will assert my seniority and upgrade to the latest and greatest Apple hardware and pass mine on down the line. This time around the hardware I couldn't resist was the unibody MacBook Pro. I love the look and the feel of it. I had been putting off re-installing and upgrading the hard drive in my old MBP for a while. Procrastination pays off again! Installing the 320GB drive in the unibody MBP took all of fifteen minutes.
The reason for the HD upgrade was two-fold, one was a slight bump in performance (7200 RPM) and the other was obviously storage size. Recently I have become less impressed with OS X as a development platform and have been wanting to try another OS. We have a few people at the office that are running Arch Linux and our summer intern showed me some pretty cool features of the OS. I liked the Arch philosophy and it looked like a good candidate for a dev platform.
Now this is where the 320GB HD comes in handy :)
The Triple Threat
I had seen my fellow colleagues dual booting into OS X and Arch Linux. They were using reFit as a boot loader and I was pretty impressed with the set up. Having been a long time Parallels user, I also remembered that it could take a bootcamp partition and use it as a VM in OS X. Thus the dream was born, the triple boot: OS X, Arch Linux and Windows XP.
Having just received a copy of Snow Leopard I decided it was finally time to re-install and give my OS X installation a breath of fresh air. So first things first, I created a clone of my drive with Carbon Copy Cloner and proceeded to google around a bit to find some hints on how to install all three OSes on my MBP.
I ended up using several different sources to get started. First was a blog entry that covered the most of the information that I needed. Of course it was aimed at using Vista and Ubuntu so I had to interpret it slightly. Looking back at it, there is still one thing I need to do, set up a swap file.
Update: I found a nice how-to about how to set up swap space on linux (quite old but still relevant it seems). Here is the gist of what I ended up doing:
$ sudo mkdir /work
## make a 1GB swapfile
$ sudo dd bs=1024 count=1M if=/dev/zero of=/work/swapfile.1
$ sudo mkswap /work/swapfile.1
$ sudo swapon /work/swapfile.1
Then add the entry at the end of your /etc/fstab so that it gets created on boot.
$ sudo vim /etc/fstab
...
## here is the swap file entry
/work/swapfile.1 none swap pri=5,defaults 0 0
You can add more swap as needed by adding more swapfile.n files. I had to go in later and add a total of 6GB (double my RAM). end update
Second I used the AchWiki page dedicated to the MacBook to setup the Arch Linux side of things. The ArchWiki is quite impressive and is loaded with useful information. Sometimes you have to use several pages to really figure out what is going on, but overall it's pretty concise. One handy tip was to change the UID and GID of your OS X account before using it so you can line it up with the same IDs in Arch Linux, thus making sharing home directories easier. One extra step that was needed was to create a new 'group' in the 'Accounts' preference pane in OS X so that my group showed up with a name and not just a GID.
Live and Learn
I learned a few valuable lessons while installing everything. The first lesson was realizing I should have read the bootcamp docs before I started. There is some helpful info in there including the fact that you have to use XP SP2 or higher to install. All I had lying around was an original XP Pro install disc. I attempted the first install with that disc and ended up nuking my OS X install since only one partition was showing. Common sense should have prevailed here, but I was in a hurry. A download of SP3 and a re-install of OS X later and I was back on track.
GRUB
The biggest pain I had while installing the three OSes was accidentally installing GRUB directly onto /dev/sda. Both the tutorials I was using told me NOT to do this, but apparently I was in opposite day mode. The GRUB install had the immediate effect of not allowing me to boot into Windows but still but still able to boot OS X. I was still able to boot into Arch Linux via the GRUB screen. As an interim fix, I added windows to the GRUB config file. Arch Linux sets up a windows partition example, I just had to change the partition number.
I finally got around to backing up my OS X partition so I was able to try fixing the situation (and potentially borking all the installs). First thing I tried was to use the XP install CD. Which included following these steps:
- Boot up with the Windows install CD
- Go into recovery mode
- Select windows install (usually number 1)
-
Run the FIXMBR program from the prompt:
C:\> FIXMBR
This didn't quite fix the issue, Windows would now just boot up to a black screen and Linux wasn't an option from reFit anymore. After some more googling around I was able to find a post with a potential fix on the Apple support forums.
I booted up into single user mode to fix the master boot record.
# fdisk -u /dev/rdisk0
new MBR [y/n]: y
This fixed it, now I was able to boot into OS X and XP! I'm not sure if the FIXMBR was required or not, YMMV. Next I just had to re-install GRUB on the linux partition. I used the steps on the Arch Linux wiki about re-installing GRUB and installed it into the same partition as my Linux install (/dev/sda3).
Now reFit shows and boots into all three OSes properly. Success!
Bootcamp and Parallels
Next objective was to get the bootcamp partition working with Parallels. I chose to use NTFS for my XP install. Snow Leopard can read this by default, but it doesn't read and write by default. I found a little snippet on a MacFUSE forum somewhere that showed how to turn on the native read write support in Snow Leopard. Here is what I had to do.
Get the UUID of the partition with Windows installed on it (my XP install is on the fourth partition)
$ echo `sudo /System/Library/Filesystems/ntfs.fs/ntfs.util -k disk0s4`
6369b368-57d8-46e6-80c6-e6ac095fb604
Use your favorite editor to modify the fstab.
$ sudo vim /etc/fstab
Then add the following (replacing your HDs UUID)
# bootcamp partition in read/write
UUID=6369b368-57d8-46e6-80c6-e6ac095fb604 none ntfs rw
Next time you boot up you will have an NTFS partition that is read write in OS X. The rest of the Parallels install was straight forward. Now I can use my XP boot partition as a VM in OS X!
Final remarks
I'm quite excited to have three bootable OSes on my laptop giving me the best of all worlds! I learned a lot about boot loaders during this exercise as well. Though I'm still a bit hazy on how this works with reFit. Whatever you do, DO NOT install GRUB into /dev/sda! This set me back a couple days since I was using the laptop for work purposes as well.
Next step for me is to get OS X to recognize the ext3 partition and for Arch Linux to use HFS+ read write. None of the MacFUSE modules and ext3 helpers seem to work on Snow Leopard at the moment. Anyone know of any working solutions out there for Snow Leopard?
Update: I was able to mount the ext3 filesystem with fuse-ext2 using the following commands.
$ mkdir /Volumes/ARCHIE
$ sudo fuse-ext2 /dev/disk0s3 /Volumes/ARCHIE -o force,allow_other,volname=ARCHIE
This mounts the FS at the /Volumes/ARCHIE folder with read write capability and names the volume ARCHIE. One last thing that I haven't figures out is how to get this to work properly in /etc/fstab in Snow Leopard. end update
Jun 10, 2009
Launcher Showdown: Quicksilver vs LaunchBar
A good app launcher makes all the difference in the world to me. It is really painful when there isn't one available, "How the hell do I open an application?!?!". On OS X there is always the Spotlight functionality, but that has never satisfied my needs. I need to be able to manipulate the item from the launcher, not just open it. I guess "launcher" is a really bad term for it, in reality it's a "do a bunch of awesome stuff thingamajig", but that's not easy to say.
Quicksilver has been my "launcher" of choice for quite some time now and before that I was using Butler, which I originally tried out because of its clipboard implementation. Quicksilver was recently open sourced, since the lead developer now works for Google and their launcher product called Google Quick Search Box. This was pretty much the beginning of the end for QS. While there are still some folks working on the open source version, it has been a slow process.
I recently overheard Andi Zeidler talking about LaunchBar on Twitter, so I decided to give it a try. That has turned out to be an excellent choice. Quicksilver has been plagued with some really strange issues for quite some time. Most of them are bearable, but sometimes it can be really annoying when you are trying to get something done fast. In the week and a half that I've been using it, the program has really exceeded all my expectations. So what makes it better?
LaunchBar Pros
There are a lot of really nice features in LaunchBar. Here is a rundown of some of the features that make it one of the best I've used.
- Web searches are quoted properly, you can search for "Bob Marley & the Wailers" and get the proper results
- Setup of LaunchBar is orders of magnitude easier than Quicksilver. If you've ever set up the clipboard and shelf in Quicksilver then you know what I'm talking about.
- The default setup of LaunchBar makes much more sense, which is helpful for n00bs
- The clipboard in LaunchBar is really nice
- It doesn't assume that everything with a dot in it is a URL
- You can access each line of a copied item from a sub menu
- The clipboard menu tells you where the item was copied, and how many characters and lines it contains
- You can merge multiple clippings into one by using the ClipMerge functionality
- Using the OS X services menu items in LaunchBar actually works. This makes things like WordService useful again!
- LaunchBar is really fast compared to Quicksilver
- LaunchBar doesn't randomly forget its settings like Quicksilver would with the actions sometimes
LaunchBar Cons
While it has been an overall positive experience, there are still some things LaunchBar could learn from Quicksilver.
- No custom triggers. This was one of my favorite things about Quicksilver. You could assign a keyboard shortcut to any "subject, verb" action. LaunchBar does not have this concept. It has "abbreviations", but it's not the same. I liked to be able to type "ctrl + option + cmd + l" and go to the login window. You can still do this in LaunchBar, but it takes more keystrokes.
- No social bookmarking support. Quicksilver has a nice delicious integration that allows for the indexing of all your bookmarks and their corresponding tags. I used this feature A LOT. My brain is on the web, Quicksilver helped me query it very quickly.
- LaunchBar doesn't have the concept of plugins like Quicksilver does. If it isn't there, then your only option is Applescript. Applescript sucks.
- LaunchBar doesn't have the concept of a persistent clipboard or shelf. This is another feature from Quicksilver that I use A LOT.
- Running unix executables from LaunchBar requires an open terminal window. Quicksilver can do these tasks in the background. LaunchBar has the ability for these scripts to be placed in the "Actions" folder. However, you have to have a property list file next to it that tells LaunchBar to run it in the background. This is less than optimal, especially for pre-existing executables.
- LaunchBar doesn't have the same "comma trick" as Quicksilver does. I rarely use this feature, so it's not a big deal for me. You might be able to exchange some of the behavior by using the ClipMerge facility in LaunchBar.
- With LaunchBar, you really need to read the docs to get the most out of it. There are a a lot of hidden gems in the form of keyboard combos. With Quicksilver it was usually pretty self-explanatory how to do things. Luckily the LaunchBar docs are very informative.
- You can't start entering text like you could with Quicksilver by presssing "." and typing some text. LaunchBar has an "Enter Text" action that allows you to do something similar. Someone in the forums suggested that you assign "," to the "Enter Text" action. This works out well.
- Performing "actions" on the "subject" are not as easy in LaunchBar. For instance, there are usually some actions hidden in the context menu of the item, you can right click or use a keyboard combo to open it up, but that's kind of a pain
Conclusion
In my humble opinion, LaunchBar is the best launcher out there right now. It could still stand to learn a few things from Quicksilver. But overall LaunchBar is the superior application. Hopefully there are devs watching the LaunchBar forums that will implement my requests :) While I wait for them to be implemented, I'm using a stripped down Quicksilver that just contains the delicious and shelf plugins to fill in for that missing functionality of LaunchBar.
If you haven't given a try yet, I strongly recommend you download a trial of LaunchBar 5 and take it for a spin.
Apr 18, 2009
LaCie 1TB Big Disk Drive Failure....Or Not
There are days when you just have to say, "I fuckin' love the internets!!", more on that in a minute. I bought a LaCie 1TB Big Disk a couple of years ago and it slowly became my "everything disk". The only problem with this external drive is that it is setup in a RAID 0. This means that the data is 'striped' across two 500GB drives for performance. But, if one drive fails then you lose all your data!
Very recently the drive decided to start making some strange noises while struggling to start up. The drive would also emit a loud hissing noise while running. This started to freak me out since I had nowhere to back up 1TB. I debated a while and then bought a Drobo last week! Now I have 4TB usable on the local network :)
After playing around with the Drobo I decided it was time to fire up the LaCie and back it up. Sure enough the LaCie drive failed to mount. It sounded like it really wanted to but it just couldn't. Sadness!
My first google on the subject was "lacie big disk extreme sucks" (realizing later mine was not 'extreme'). The third hit was a blog post entitled LaCie Big Disk Extreme Failure. Now this is where the love of the internet comes into play. The post had around 100 comments on it. Two of them described what was happening to my drive perfectly. The first describing the startup woes:
problems included; bad booting up, clicking noises, freezes and a complete failure to mount (link)
And the second:
The power supply adapter a made high pitch sound (not very noticeable unless up close) and upon opening the board had burnt brown areas and the capacitors where bulging out the tops. (link)
I had not noticed this noise coming from the power adapter, but low and behold mine was making the same sound. So what was the solution in the end? A new power adapter. WTF! Internets FTW! I decided that I'd shell out the $30 on the chance that it might work. Power supply arrived yesterday, and now my drive is fully functional and backed up to my Drobo!!! Happiness!
Feb 25, 2009
A Comic For Those Who Run Buildout Regularly
If you're a geek of any sort then you have probably run across the wonderful comic xkcd. It's one of the few comics that I read on a regular basis. There was a comic that ran a while back about compiling code that doesn't quite relate to us Plone developers. Since the comic is released under a Creative Commons license, here is the re-mixed buildout version :)

Now there's no reason to be ashamed of surfing the net or sword fighting in the halls while your buildout is running!
Feb 11, 2009
Taming My $SHELL
I've been using the command line in various ways for a long time. Back in the DOS days it was the only way. Then windows came along, but there was still the need for a little 'cmd' action every once in a while. It wasn't until I started working at Six Feet Up that I re-kindled my love affair with the command line. This time around it was with unix and primarily ZSH.
I started out at Six Feet Up doing customer support and systems administration. This required learning a new skill set, the command line. As I made the transition from sysadmin to web developer this skill set transferred over quite nicely. It took me a little while to realize that all the things I was doing on the command line could be turned into shortcuts. My first run in with aliases involved the 'ls' command. Normal 'ls' output leaves a lot to be desired (especially for a n00b).
$ cd
$ ls
Applications Desktop Documents foo.txt Library runme
Ok, so foo.txt must be a file, but what the hell are all those other things? This is easily solved with some extra options that denote the type of item and color code things.
$ ls -GF
Applications/ Desktop/ Documents/ foo.txt Library/ runme*
Now it's clear that foo.txt is a file, runme is an executable and everything else is a directory. But who wants to type that every time? Not me. So what do we do? The solution is to modify your shell's startup files. In my case I would just add an alias to my .zshrc.
alias ls="ls -GF"
Now when I type 'ls', it automatically adds the options in for me. This is old hat for a lot of command line hackers out there. For n00bs like I once was, this was a gold mine. I just recently published all my configuration files on github for mass consumption. This is the culmination of years of tweaking and prodding.
Once you get used to the comforts of a well defined set of user conf files you can never go back. This became a problem for me when Six Feet Up's hosting business started to really take off. Suddenly instead of five machines, we had ten, then twenty and more on the way. The obvious problem here is keeping all your shell customizations in sync. Luckily we have subversion configured on most of the machines.
At some point I had the bright idea to put all my confs into subversion. This made it really easy to get set up on a new machine.
$ ssh some-machine

Welcome to Some Machine!
$ svn co https://svn.example.com/svn/claytron/dotfiles .dotfiles
$ ln -s .dotfiles/.zshrc .
Now I could have the same .zshrc file on all the servers fairly easily. With this setup, if I modified the conf on one server, then I could get the updates on the others. This worked well for a while. Then I started adding all my other confs into the mix. Settings for vim, screen and readline got added in. Now I had to go to each machine, update the checkout and symlink any new confs into my home directory. The solution for this slowly evolved into a shell script.
The current version has advanced in many ways since the original and has taught me a lot about shell scripting. This has solved the symlinking issue for me.
The only other problem is keeping up to date. I would log into a machine and never even think about updating the .dotfiles dir to get the latest settings until something was missing. Then another lightbulb went off. Why not update them automagically? This is when I decided to put some code in to run an svn up on the .dotfiles dir each time I logged in. Here is what the current code looks like. It works like a charm for me in our environment.
The confs that are up on github now reflect all these trials and tribulations. They also blend bash and zsh together for me. I figure at a minimum most machines will have bash installed. So I went through and put all the 'common' elements into common files and put all the zsh or bash specific stuff into the respective startup files. Github also allows for an easy way to download my files in a tarball if I don't have access to svn or git. Github has continually impressed me since I started using it.
Now I'm ready to take over the world on almost any machine I log into :)
Jan 24, 2009
AppleScript + Party Shuffle Pt. II
We're back for another round of AppleScript and Party Shuffle. Last month I wrote about adding missing party shuffle features using AppleScript. I noticed that there was one issue with the scripts. If you selected an album that had multiple discs then it would add all the discs to the party shuffle ordered by track number. So for example, you have an album that has two discs with three tracks a piece. Then you would get this:
Disc One Track 1
Disc Two Track 1
Disc One Track 2
Disc Two Track 2
Disc One Track 3
Disc Two Track 3
This is obviously not what we wanted. I spent a little time today updating the scripts so that they behave correctly. Now if you select the same album as our example above this is what you will get:
Disc One Track 1
Disc One Track 2
Disc One Track 3
Disc Two Track 1
Disc Two Track 2
Disc Two Track 3
This of course assumes that you have properly set up the disc number and disc count for your tracks. I'm pretty anal about this kind of stuff, so my library has them all set (even Disc 1 of 1). If the disc count is not set then the script will assume that there is only one disc and won't go through the disc sorting routine. You can get the latest scripts here:
Jan 12, 2009
Naptown Roller Girls Third Season Begins
It's finally here!!!! The third season has started for the Naptown Roller Girls. Last Saturday our Tornado Sirens hit the track and faced off against the Steel City Derby Demons. I've been trying to do my part in promoting the team through all my social networks, upcoming and eventful. I don't think they really needed my help since the home opener's online tickets sold out a day or two before the bout. On game day there were only paper tickets left at the box office, which also eventually sold out. Luckily my wife and I bought season tickets this year! None of our friends bought tickets before hand, so we showed up when tickets went on sale at five to make sure they could get in. We were probably some of the first fans to show up. The crowd really started to gather around quarter to six. We grabbed a spot in line so that we could get first pick of suicide seats. In three seasons of derby action, this was my first time in the suicide seats. We ended up getting a nice spot in the third turn. But alas, no roller girls ended up in our laps.
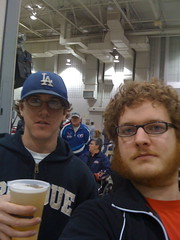 As we settled into our seats the first order of business was to get some beers. I was surprised to find that there was a nice selection of imports and micro brews on tap! Roller derby just got that much sweeter. In addition to the usual Bud and Bud Light they had Stella Artois, Red Hook ESB, Goose Island Winter Warmer and something else that escapes me at the moment. While waiting for the bout to start I noticed there was a new scoreboard set up. At first glance it seemed to be an improvement. But once the bout started, it was hard to read the time remaining. This season brings some other changes with it as well. The bout is now divided into halves instead of periods. There are also a few other changes to the rules. But by far the biggest change this year for the Sirens is their uniforms. They've switched to a sportier red and black jersey and ditched the Jerry Lee western style shirts. I'll miss the old uniforms, they were so freakin' cool!
The Sirens jumped out to an early lead at the beginning of the first half and the crowd was at fever pitch. You could feel the excitement brewing in the air. 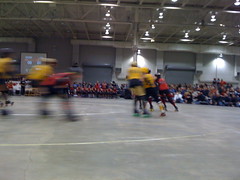 They went back and forth a bit and then the Derby Demons hit their stride. They grabbed the lead and never looked back. Just before halftime, the Derby Demons put up a twenty point jam that the Sirens couldn't overcome. They went into the half down thirty points with the score 55-25. Despite our team getting crushed the crowd was still energized most of the second half. The final score ended up being 99-44 in favor of Steel City. Just as you could feel the excitement in the first half, you could sense the disappointment at the end of the bout. Luckily we have lot's more derby action coming up! This year the Sirens are joined by their junior varsity team the Warning Belles. The next bout will be the debut of the new JV team. There will also be two double headers this year featuring the Warning Belles and the Tornado Sirens!! It's going to be a fun season, get your tickets and join us!


